Quickstart guide
Learn the basics of using Twentig with the Twentig One theme or any block theme.
Installation
To take full advantage of all our tools, we strongly recommend you use the Twentig plugin with our Twentig One block theme along with the latest WordPress version.
Install only Twentig
You can use the Twentig plugin with any WordPress theme. To install it:
- In your WordPress dashboard, go to Plugins > Add New.
- Type Twentig in the search box.
Alternatively, click Upload Plugin to upload the plugin .zip file. - Click Install Now.
- Once the installation is complete, click Activate.
Import a starter site
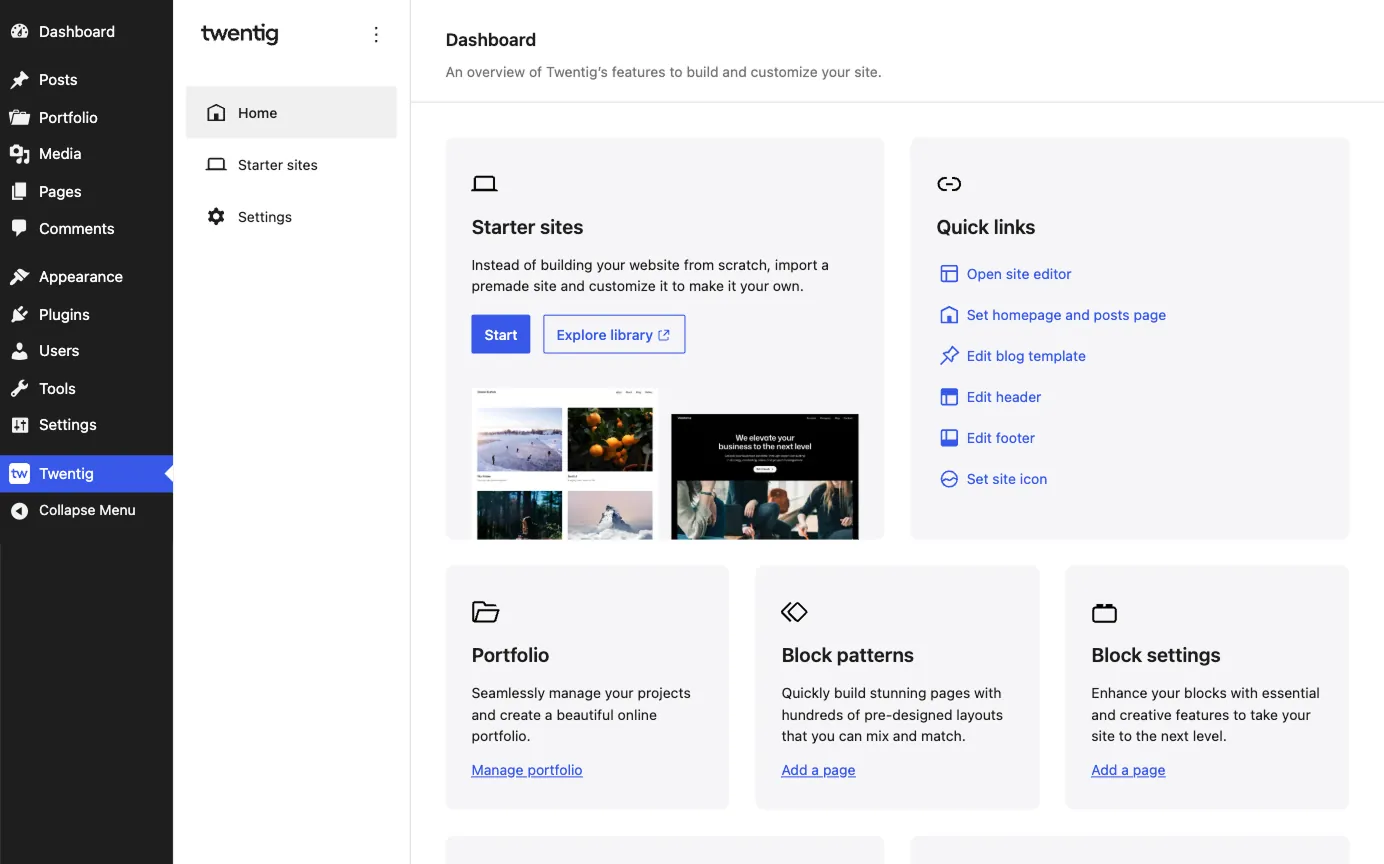
The easy way to get started is by importing a ready-made website. Twentig includes four starter sites you can import directly from your WordPress dashboard, then personalize instantly with our Onboarding Customizer. Additional starter sites will be available to download on the starter sites page.
Importing a starter site will create new pages, posts, navigation, and images while preserving your existing posts and pages. However, it will override your templates (index, archive, page, single posts, etc.), template parts (header, footer), and styles (typography, colors, layout).
Note: Starter sites are only available for the Twentig One theme and the WordPress Twenty Twenty-Five and Twenty Twenty-Four themes. The Onboarding Customizer is only available for the Twentig One theme.
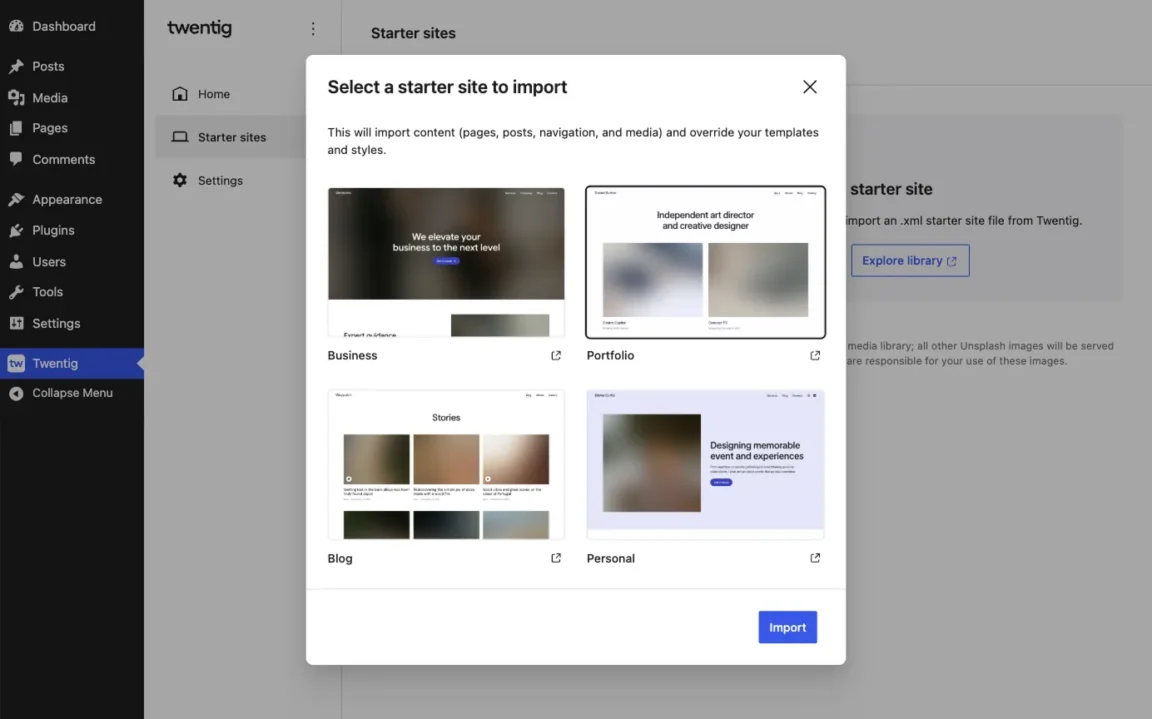
Method 1: One-click import via the Twentig plugin
- In your WordPress dashboard, go to Twentig > Starter sites.
If the WordPress Importer plugin isn’t installed on your site, you’ll be prompted to install it. - Click Select.
- Choose the starter site that best suits your needs, then click Import.
Once the starter site is imported, you’ll be guided through the Onboarding Customizer to personalize your site. Choose from four distinct presets to kickstart your design, and customize your header, footer, homepage, blog, and portfolio layouts — plus select a font preset and color palette.
Note: The Onboarding Customizer is only accessible during the import process and cannot be reopened once you click Finish. All options can still be reproduced in the WordPress Site Editor using patterns and block options.
Method 2: Export from twentig.com and import via the Twentig plugin
You can preview and customize the starter sites on twentig.com. Click the starter site of your choice to open its dedicated page:
- Click Customize live at the top of the starter site page.
- Customize your starter site and click Export. This downloads your starter site as an .xml file.
- In your WordPress dashboard, go to Twentig > Starter sites.
If the WordPress Importer plugin isn’t installed on your site, you’ll be prompted to install it. - Click Upload, choose or drop your .xml file, then click Import.
Build your site with blocks
Twentig enhances the existing WordPress blocks by offering additional styles, block settings (marked with a ![]() icon), and CSS classes. These options appear in the block settings sidebar or top toolbar when you select a block. Click
icon), and CSS classes. These options appear in the block settings sidebar or top toolbar when you select a block. Click ![]() to open the settings sidebar.
to open the settings sidebar.
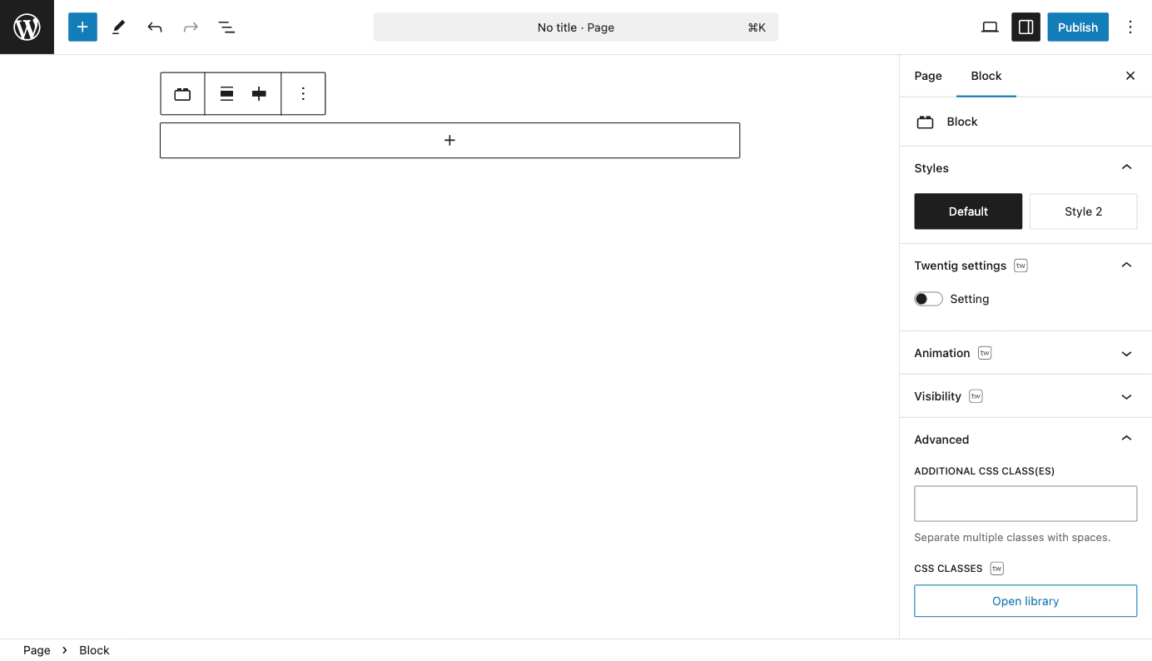
Customize blocks with additional settings
Twentig extends the following WordPress core blocks:
Design blocks
- Accordion: icon
- Button: icon, icon position, video lightbox
- Columns: responsive stacking layout
- Column: stretched link
- Group: stretched link, hover styles (text color, background color, border color, shadow), shape separator
- Separator: styles (asterisks, dotted, dashed), width, height
Media blocks
- Image: shape
- Gallery: justified and carousel layouts (available as block variations), unstretch last row, responsive layout, vertical alignment
- Cover: stretched link, shape, hover effect
- Media & Text: styles (shadow, overlap, hard shadow), responsive layout, stretched link, full height
- Video: autoplay when in view, minimal controls
Text blocks
- Paragraph: typography options, responsive alignment
- Heading: typography options, responsive alignment
- List: styles (square, dash, checkmark, arrow, border, inner border, table, no bullet, inline)
- Quote and Pullquote: styles (icon)
- Details: icon
- Table: styles (border, inner border), vertical alignment
Theme blocks
- Navigation: responsive breakpoint, menu icon size, hover style, active style
- Navigation link: external link class
- Submenu: classes (rounded, shadow, no-border, align right)
- Site Logo: image width on mobile
- Query Loop: single posts filter (exclude current post, filter by category or tag)
- Post Template: responsive columns, class layouts (alt columns, alt spacer, alt grid)
- Pagination: spacing support (margin and padding), page numbers styles (square, rounded, circle, plain), previous page and next page styles (square, rounded, pill)
- Title: typography options, responsive alignment
- Excerpt: option to display only the manual excerpt
- Featured Image: shape, hover effect
- Author: inline layout, avatar shape
- Categories and Tags: styles (outline, pill, hashtag, plain, list), unlink
- Previous Post and Next Post: styles (stack)
Widget blocks
- Search: style (underline)
- Social Icons: styles (square, rounded), hover effect
- Tag Cloud: styles (rounded, pill, plain, list)
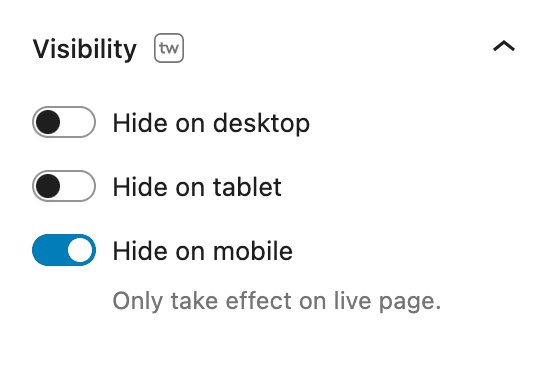
Control block visibility
In the Visibility panel, Twentig lets you control the block’s visibility based on the viewport size. When you enable a visibility option (Hide on desktop, Hide on tablet, or Hide on mobile), the block will be hidden on the corresponding device.
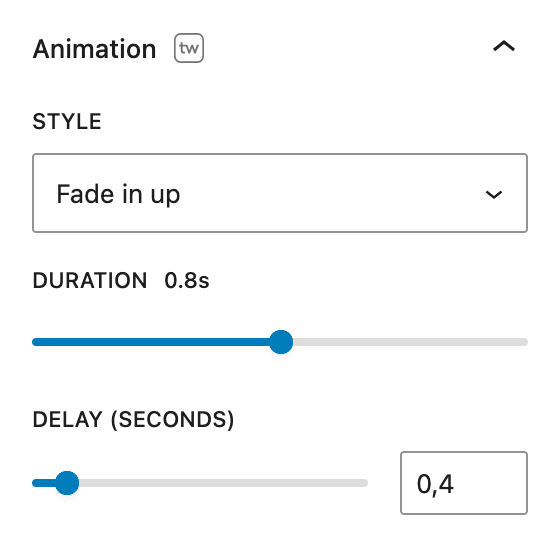
Animate blocks
Twentig lets you apply entrance effects to your blocks. In the Animation panel, you can select an animation style and adjust its duration and delay.
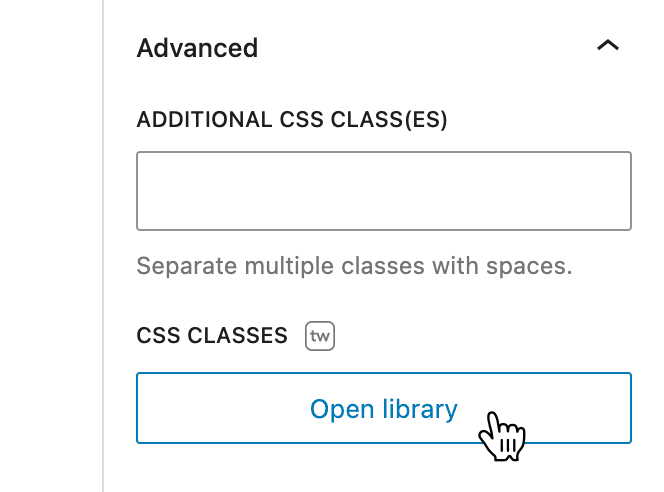
Add CSS Classes
To fine-tune your blocks, you can add CSS classes in the Advanced panel. Twentig provides a list of predefined CSS classes for various blocks.
To add predefined CSS classes:
- Open the Advanced panel and click the Open library button.
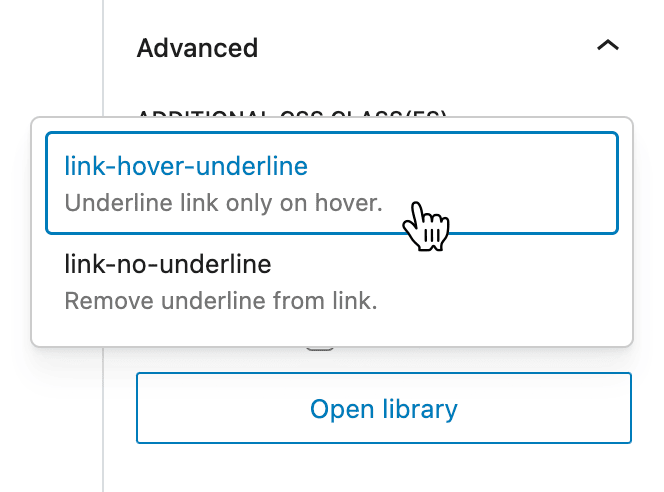
- Select the class(es) you want to apply to the block.
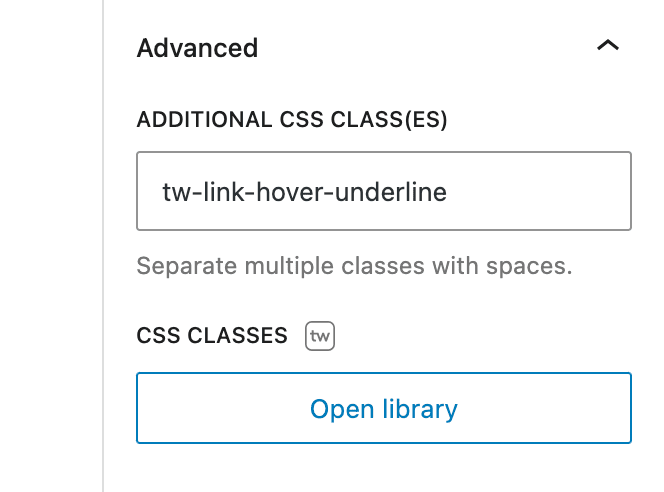
- Click outside the popup to close the library. The selected classes are automatically added to the Additional CSS Class(es) field.
Build your site with patterns
Twentig brings hundreds of pre-designed patterns, making it easy to create stunning pages. There are different types of patterns:
- Section patterns: Predefined arrangements of blocks that can be used standalone or combined with other block patterns. The categories include hero sections, team, testimonials, pricing, and more.
- Page patterns: Entire pre-designed pages that you can find under the Pages category.
- Header and footer patterns: Patterns that you can select to change the design of your Header and Footer template parts.
- Post and portfolio patterns: Patterns that you can insert to create or modify the design of the Query Loop block, used to display blog posts or portfolio projects.
To insert a block pattern:
- In the block editor, place your cursor where you want to insert the block pattern.
- Click
 to open the block inserter.
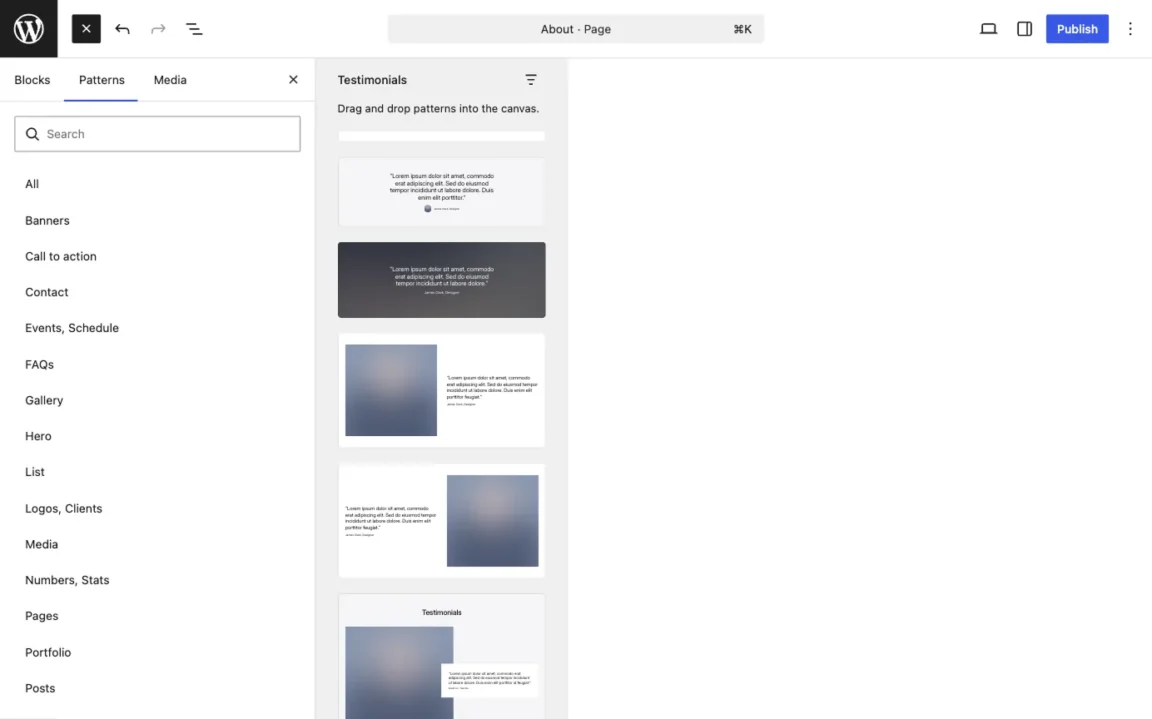
 - Click the Patterns tab.
- Browse the categories and click the block pattern you want to insert (or drag and drop it into your content).
- Once inserted, edit the pattern with your own content and customize it as needed.
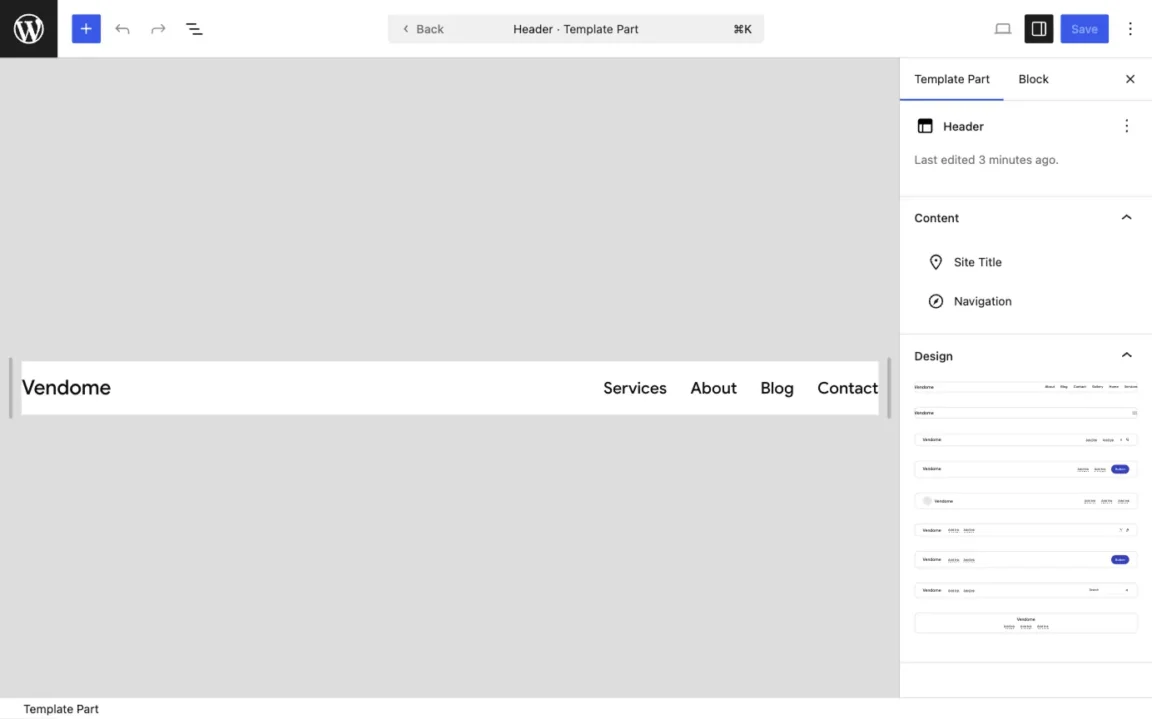
For header and footer patterns, you can choose them when you’re editing the respective template part:
- In Appearance > Editor, click the template part (Header or Footer) you want to change and click Edit original.
- In the Settings sidebar under the Design section, select the pattern you want to use. This will replace the existing content.
Create a portfolio
Twentig provides the tools you need to build a portfolio website. And Twentig One makes the experience even easier with a dedicated Portfolio starter site and ready-made portfolio templates.
Method 1: Import the Portfolio starter site
The fastest way to get started. Importing the Portfolio starter site automatically enables portfolio features and sets up your site with a professional layout ready to customize.
- In your WordPress dashboard, go to Twentig > Starter sites.
- Click Select, choose Portfolio, then click Import.
- Once imported, you’ll be guided through the Onboarding Customizer to personalize your starter site, including the portfolio index layout and individual project pages.
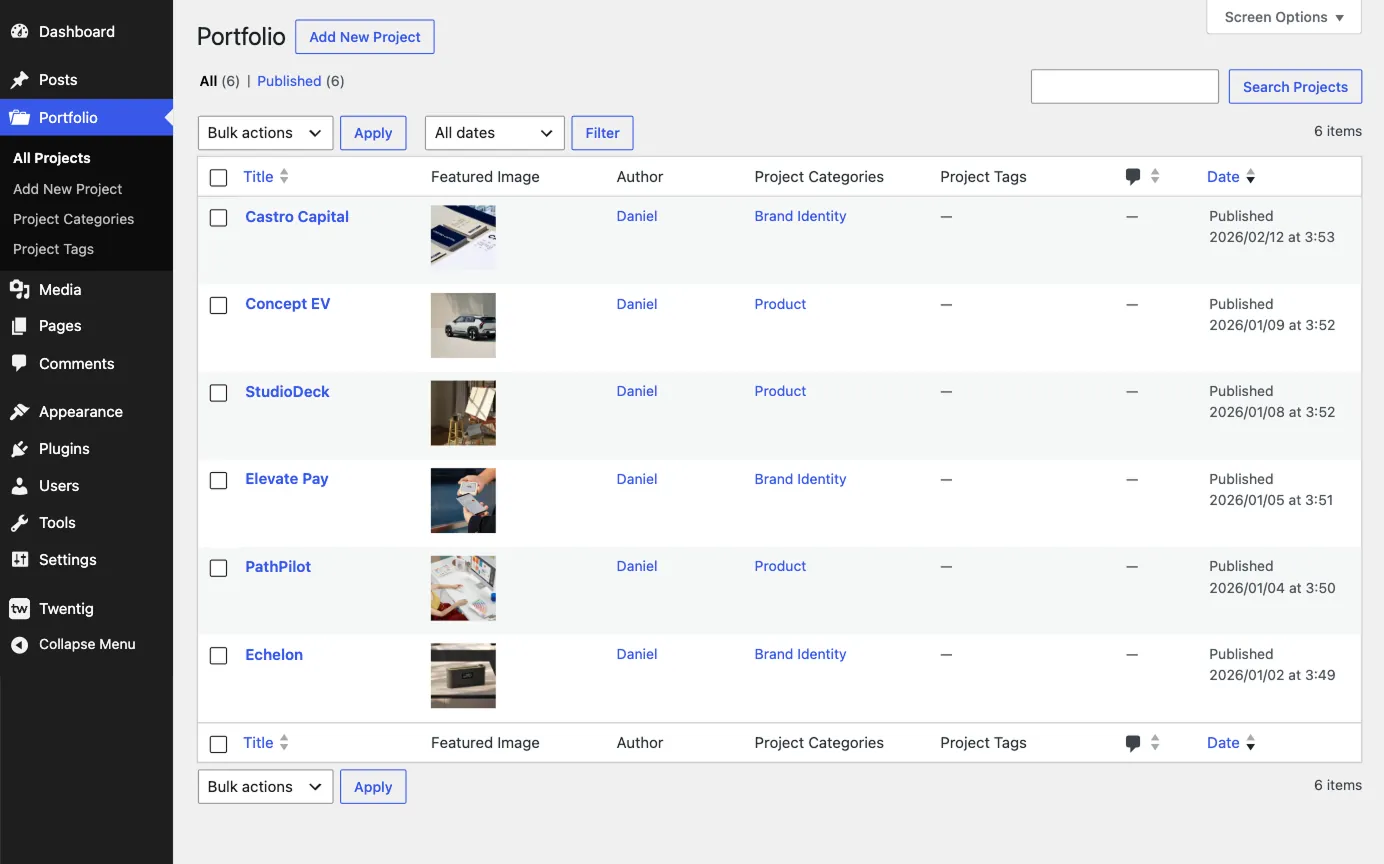
To manage, add, or edit your projects, go to Portfolio in your WordPress dashboard. Adding and editing projects works just like creating posts.
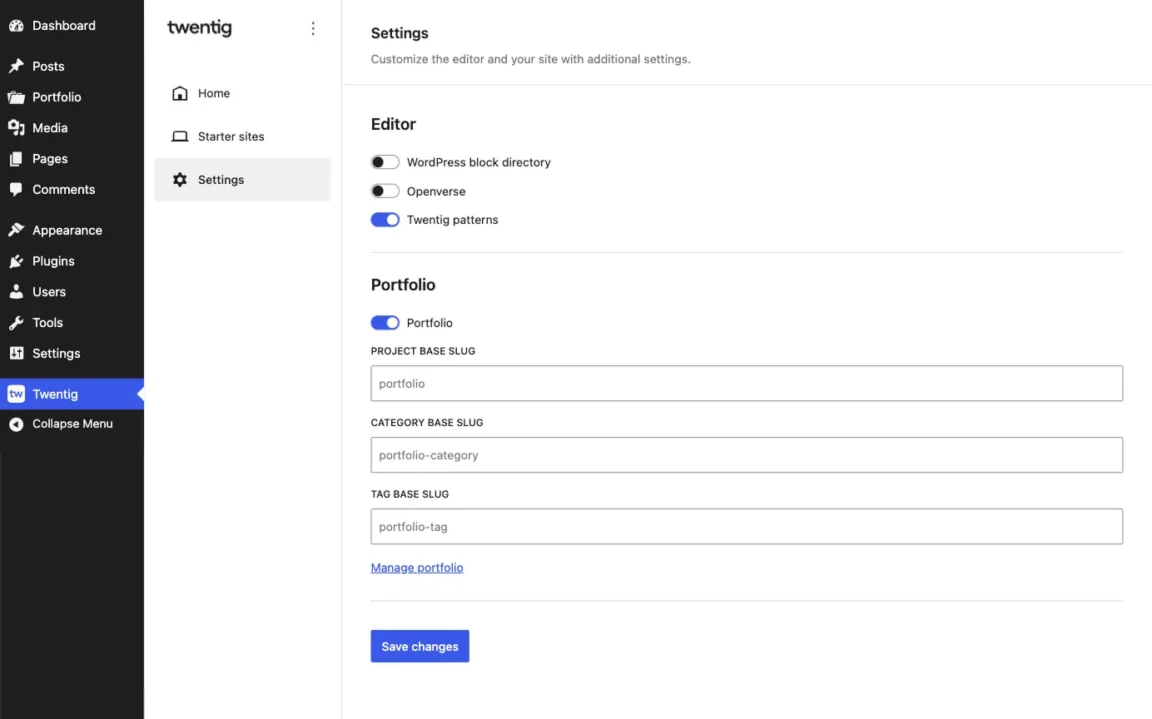
Method 2: Enable portfolio features manually
For manual setup, enable the portfolio features directly in the Twentig dashboard.
- In your WordPress dashboard, go to Twentig > Settings.
- Toggle on the Portfolio switch.
- Click Save changes.
Once portfolio features are enabled, a Portfolio menu item will appear in your WordPress dashboard to manage, add, and edit your projects.
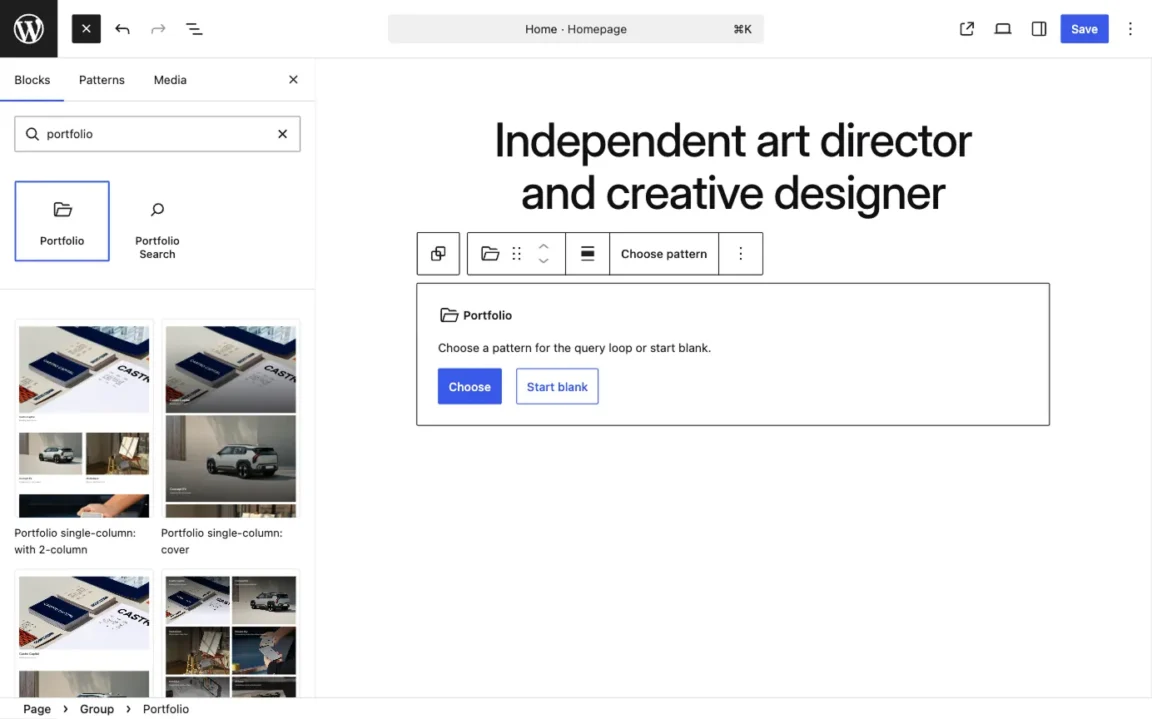
To display your projects on a page:
- Go to Pages > Add New Page.
- In the block inserter, search for “Portfolio”.
- Insert the Portfolio block. Choose to start from blank or from one of the available patterns.
Twentig One overview
Twentig One is a modern and powerful WordPress block theme designed for Full Site Editing. Featuring flexible templates, post formats, color presets, font pairings, and fluid typography & spacing, it’s the ideal foundation for any project.
Page templates
Twentig One includes four page templates:
- Default template: A clean layout with a header, footer, and an empty content area.
- Page with Title: Displays the page title and featured image above the content area.
- Transparent Header: Makes the header background transparent, allowing your hero section to appear seamlessly behind it.
- Blank: Removes the header and footer entirely for a blank canvas.
Learn how to use them with our quick guide to Twentig One page templates.
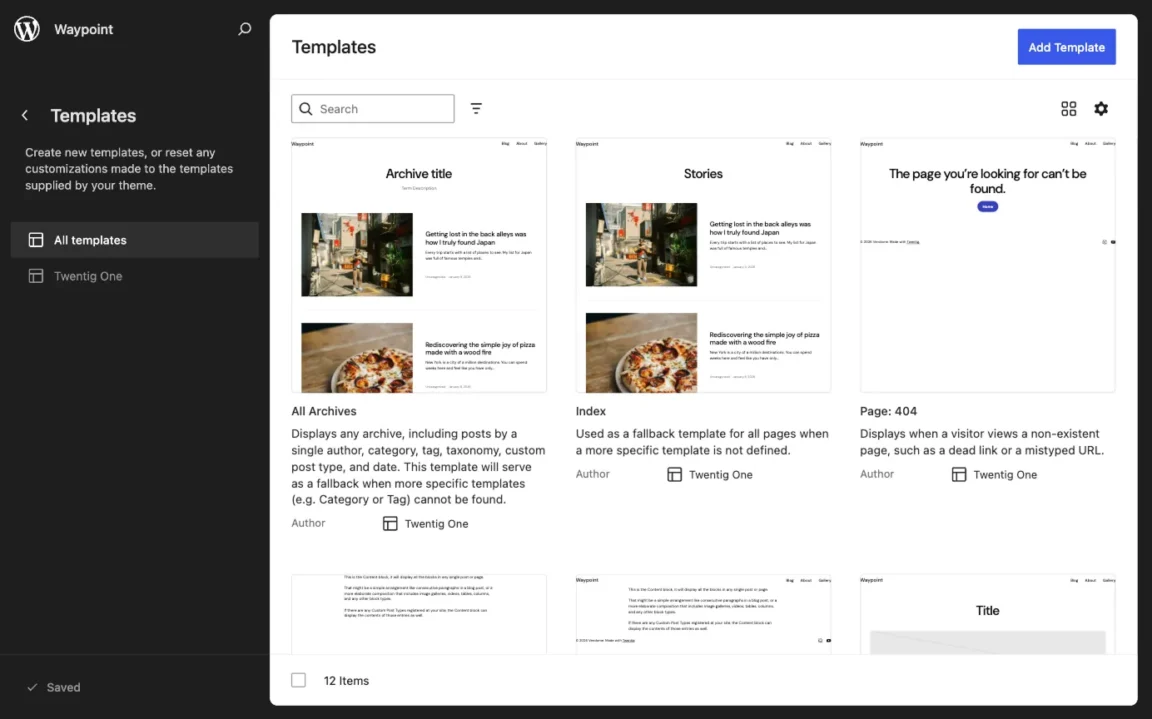
Templates and template parts
Twentig One includes the following templates that you can fully edit in the WordPress Site Editor under Appearance > Editor > Templates:
- All Archives: used for category, tag, author, and other archive pages
- Index: used for the blog index
- Single Posts
- Search Results
- Page: 404
- Single Projects
- Project Categories
- Project Tags
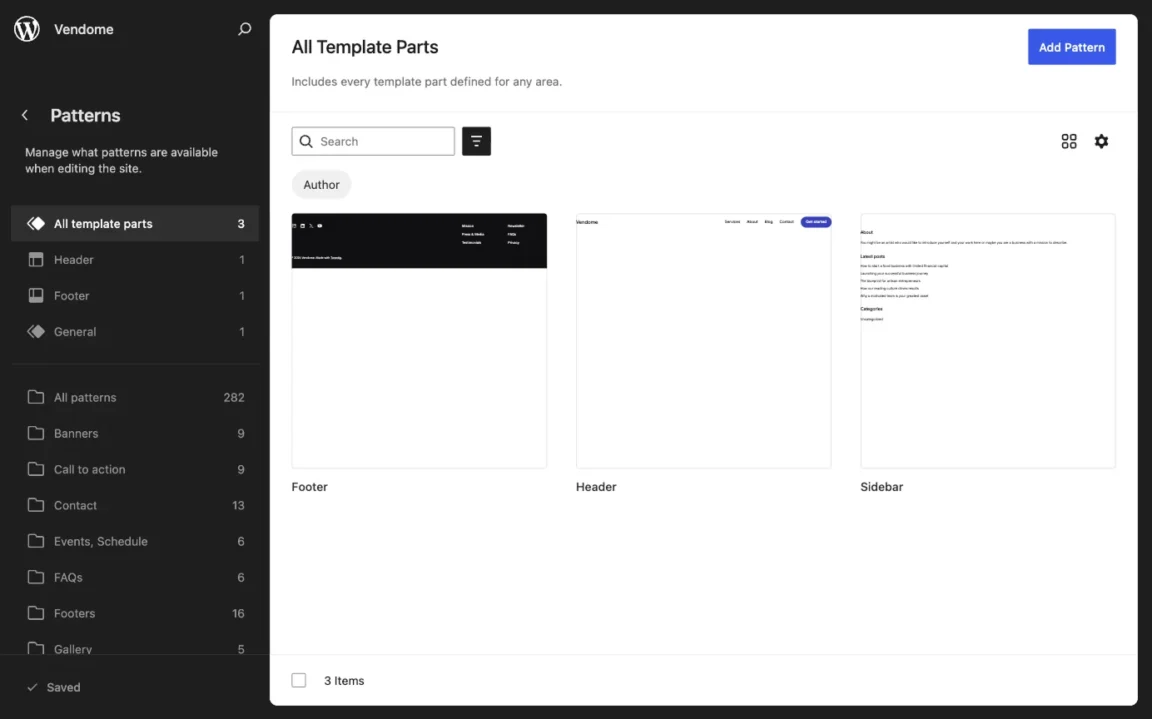
Twentig One also includes three template parts:
- Header
- Footer
- Sidebar
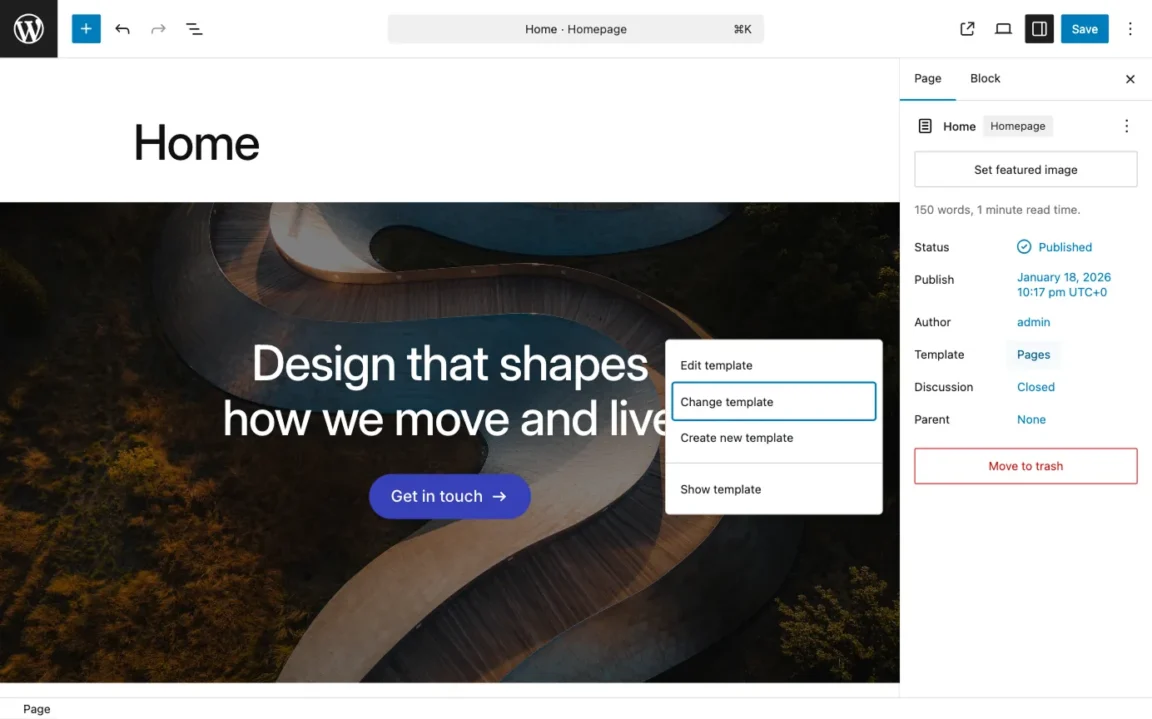
How to set the homepage
By default, WordPress displays your latest posts on the homepage. To display a specific page instead:
- Go to Settings > Reading.
- For the Your homepage displays option, select A static page.
- Select one of your pages.
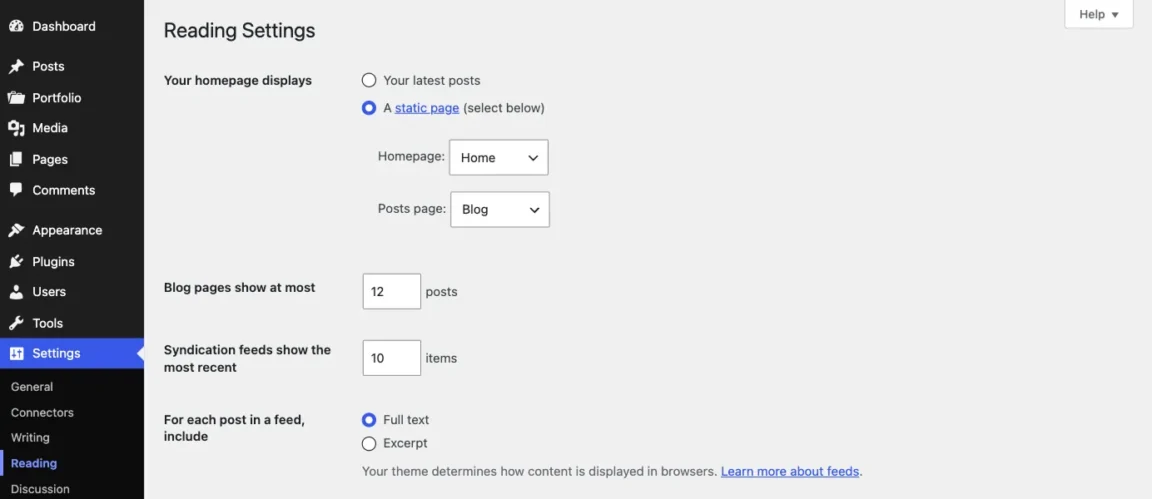
Note: If you set a blog page, the blog layout is controlled by the Index template, not the blog page itself.
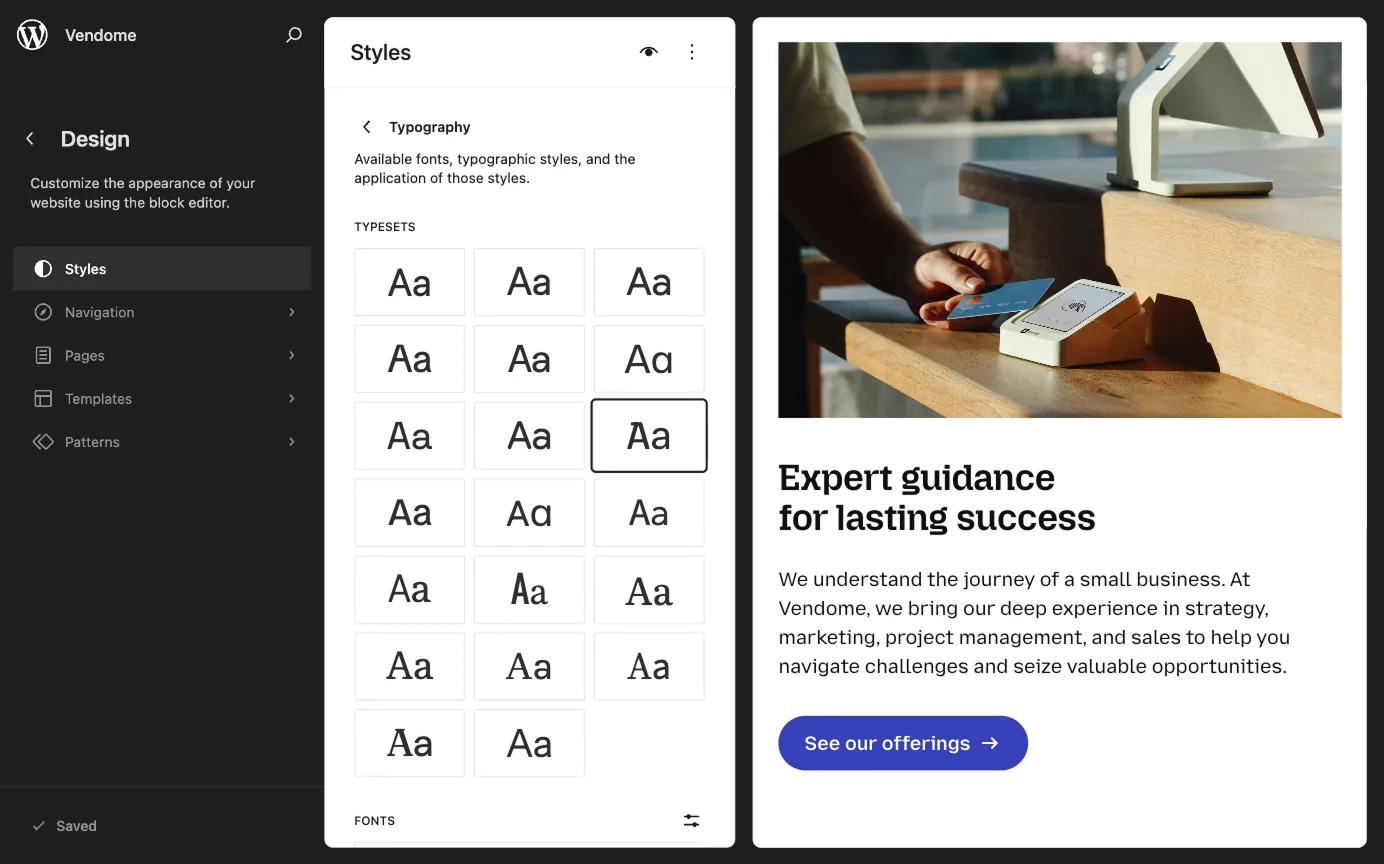
Typography presets
The theme includes 18 typography presets (typesets) that you can apply to your site in one click under Appearance > Editor > Styles > Typography.
To keep font files lightweight and fast-loading, the included fonts only cover Latin language characters. For non-Latin languages, use the default System Fonts preset or install new fonts under Appearance > Fonts.
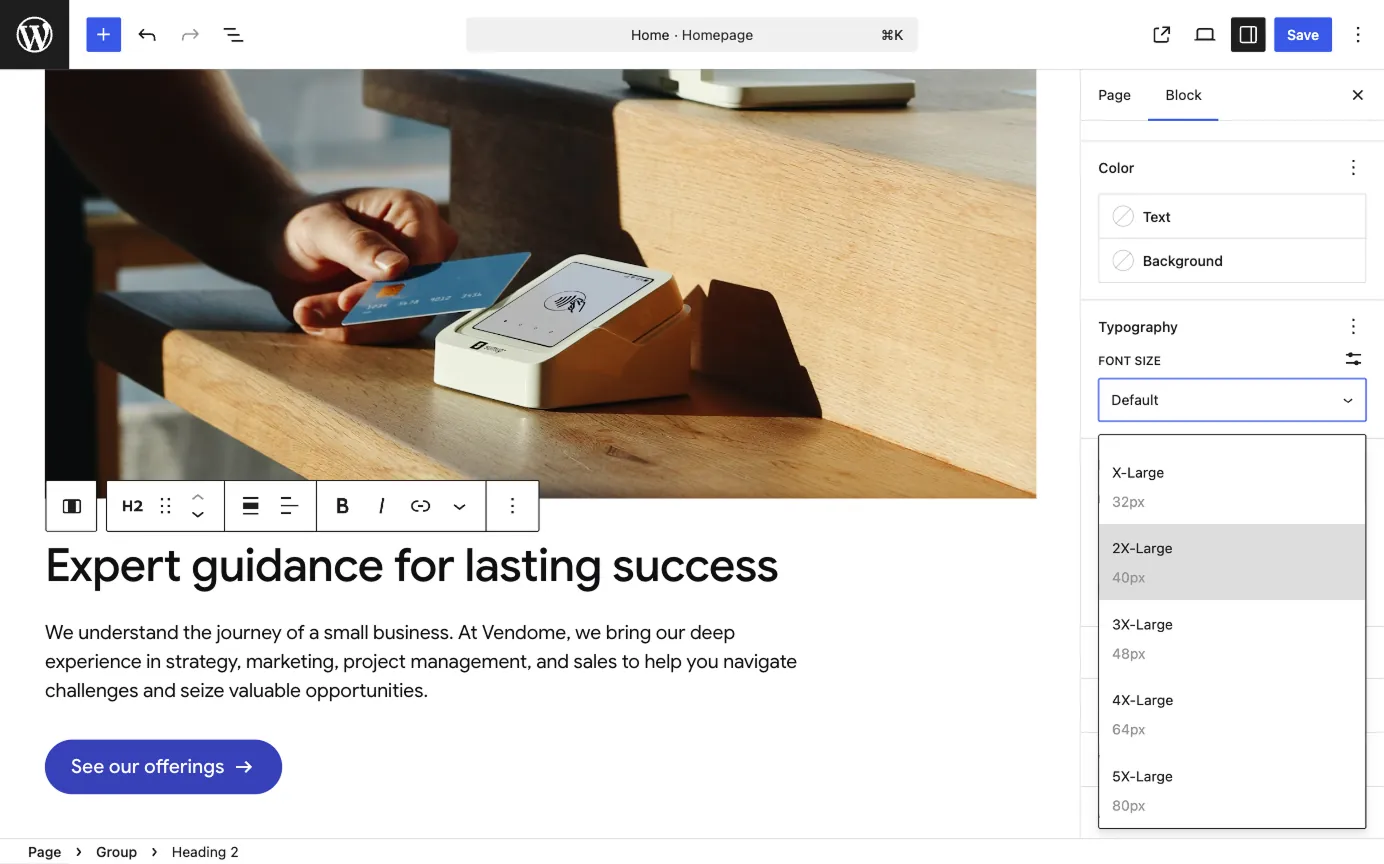
Font size presets
The theme includes a series of fluid font size presets from X-Small to 5X-Large that scale dynamically to fit the screen. You can use these presets to set the font size of your blocks such as Heading, Paragraph, or Button. If needed, you can adjust these preset values under Appearance > Styles > Typography > Font size presets.
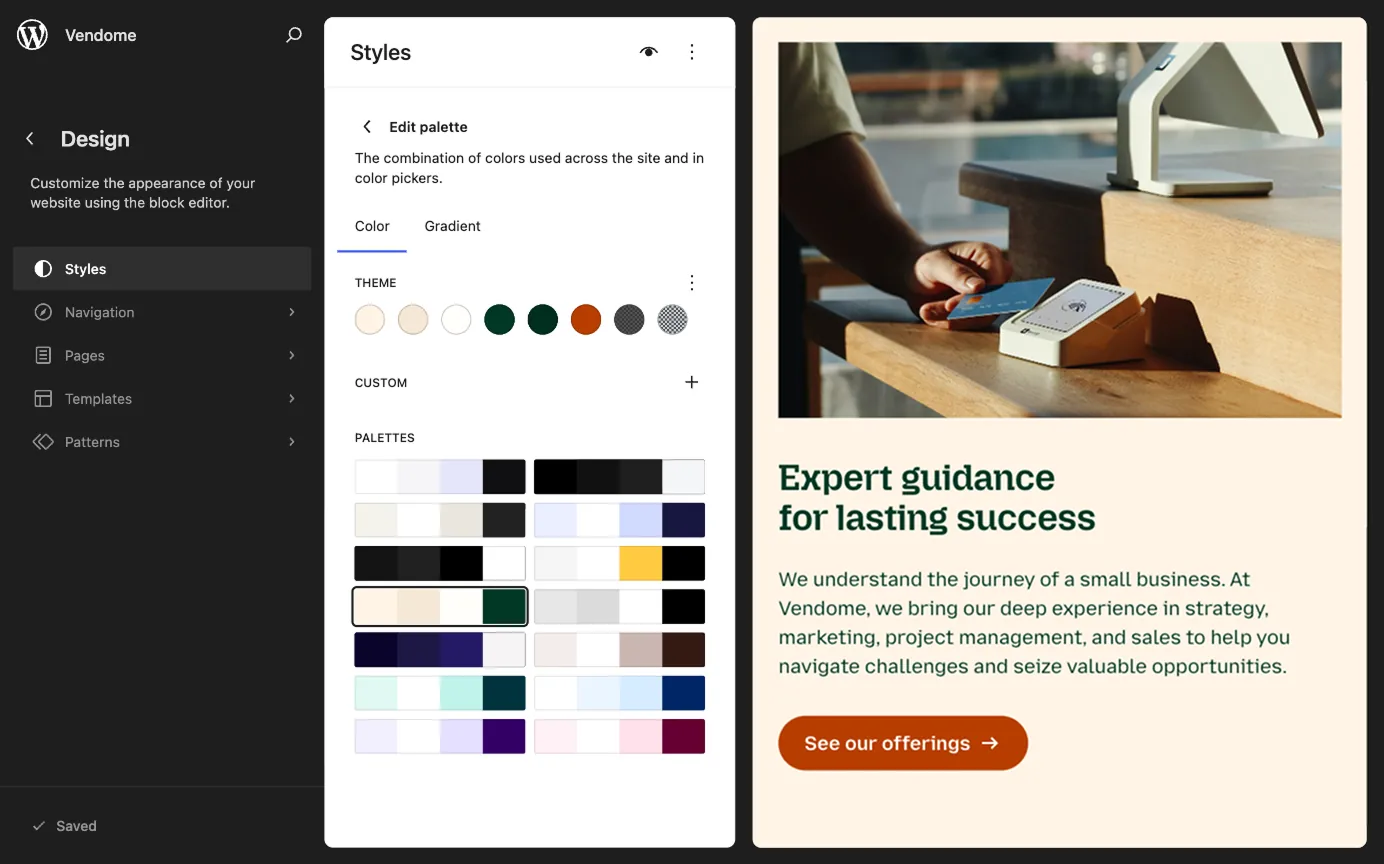
Color presets
Twentig One includes 14 color presets that you can apply in one click. To select or customize them, go to Appearance > Editor > Styles > Colors > Edit palette.
Each preset is built around a palette of 8 colors:
- Base: main background
- Base 2: secondary background
- Base 3: tertiary background
- Contrast: main text
- Contrast 2: alternative to Contrast
- Accent: highlight for elements such as buttons
- Secondary: less prominent text
- Tertiary: borders and separators
The theme also includes 9 gradient presets using the palette colors.
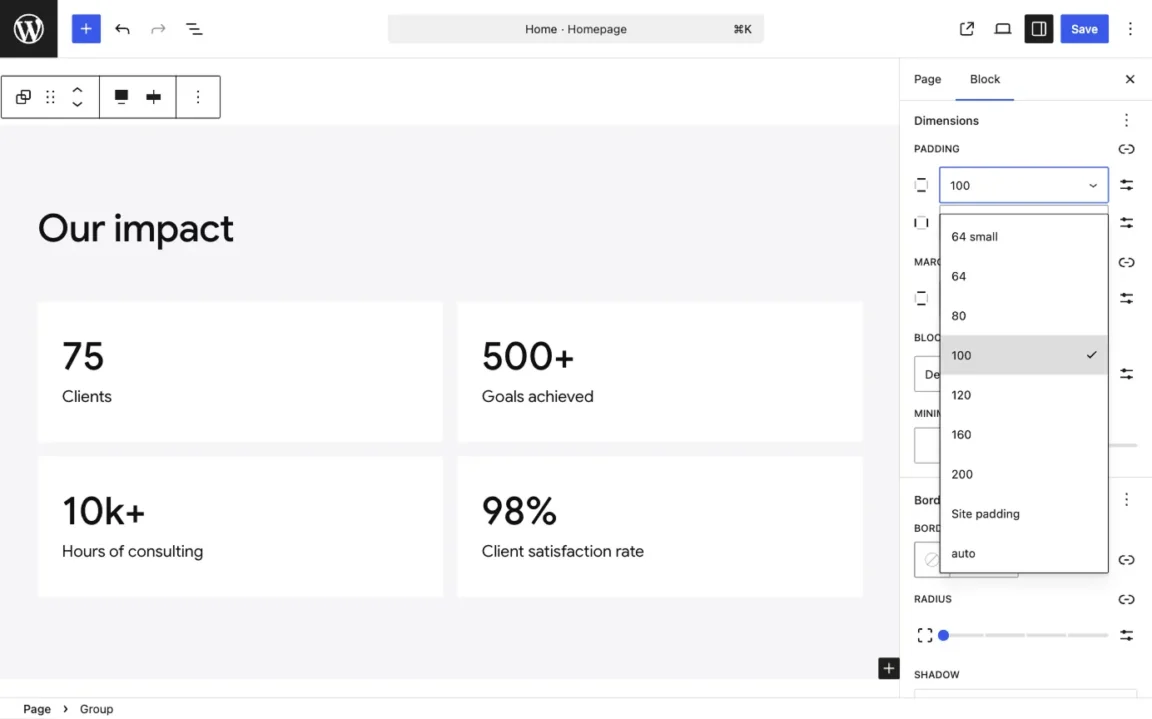
Spacing presets
Twentig One provides spacing presets for margins, padding, and block spacing, available directly in the settings sidebar:
- Values from 0 to 32 are fixed.
- Values from 40 to 200 scale responsively on mobile.
- Values suffixed with “small” reduce to 24px on mobile: useful for inline spacing such as card padding or horizontal column gaps.
- The site padding value matches the setting in Appearance > Styles > Layout: useful for aligning inner content with the rest of the site on full-width sections.
- The auto value is for margin auto: useful in flex contexts such as the Stack block.
By default, the vertical spacing between blocks is set to 24px. For single posts, Twentig One applies larger margins to media and headings added directly at the root of the block editor — so if you just want to write and publish, your content looks great out of the box.
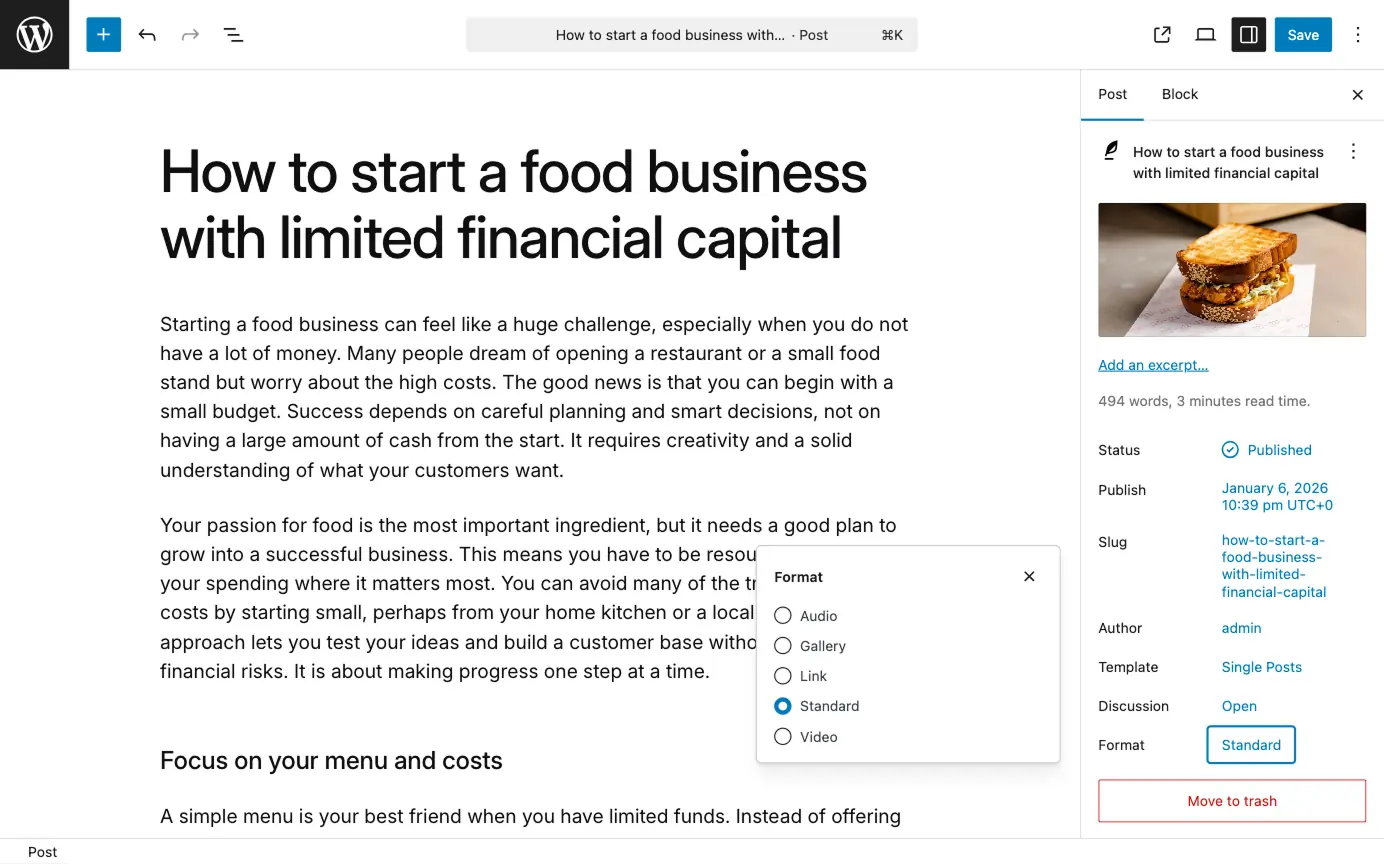
Post formats
Twentig One supports five post formats and enhances them with display options to create a visually rich reading experience for your visitors.
- Standard: uses the default layout.
- Gallery / Video / Audio: displays an icon overlay on the featured image indicating the format type, or replaces the featured image with the media itself.
- Link: adds an external link icon next to the post title, indicating the post links to an external source.
Learn more about post formats in Twentig One.

Congratulations
You’re ready to use Twentig like a pro! Subscribe to our newsletter to receive exclusive content, tips and updates.