Quickstart guide
Learn the basics of using Twentig.
Table of contents
Install Twentig
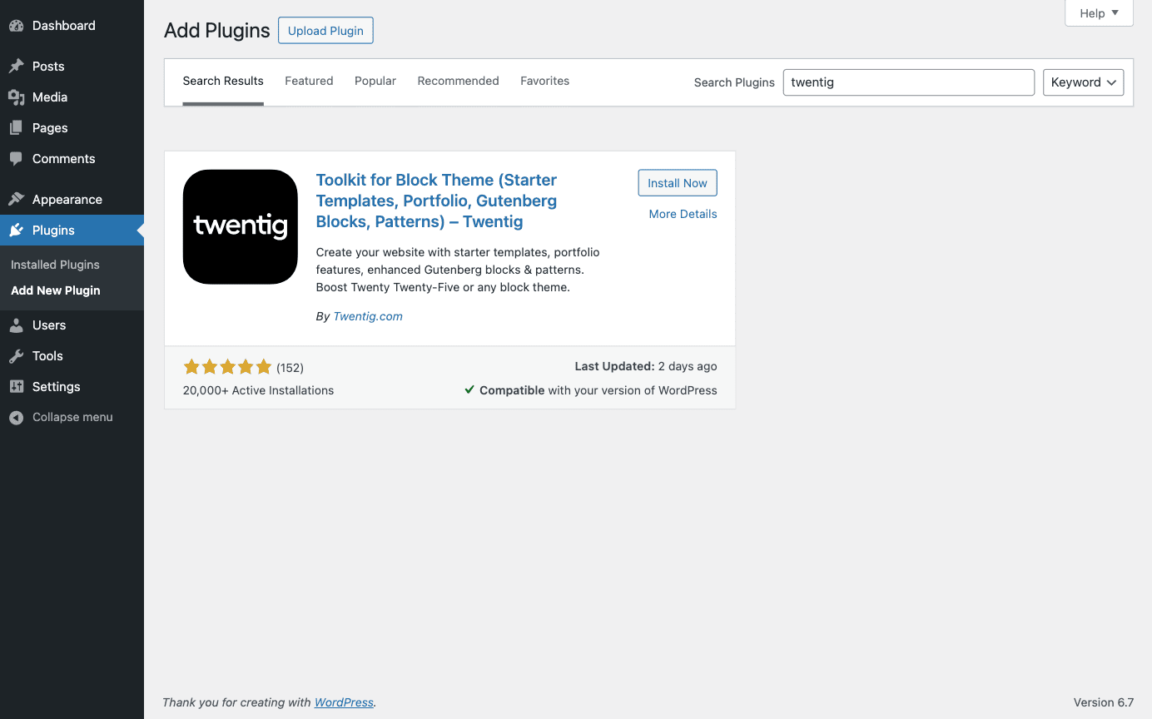
To install the Twentig plugin, follow these steps:
- Log in to your WordPress Dashboard.
- Click Plugins > Add New.
- Type Twentig in the search box.
Alternatively, click Upload Plugin to upload the plugin .zip file. - Click Install Now.
- Once the installation is complete, click Activate.
After activating the plugin, you’ll be redirected to the Twentig dashboard, which provides quick links to help you get started.

Use a block theme
To take full advantage of Twentig, we recommend you use Twenty Twenty-Five, the new default WordPress theme, or any block theme.
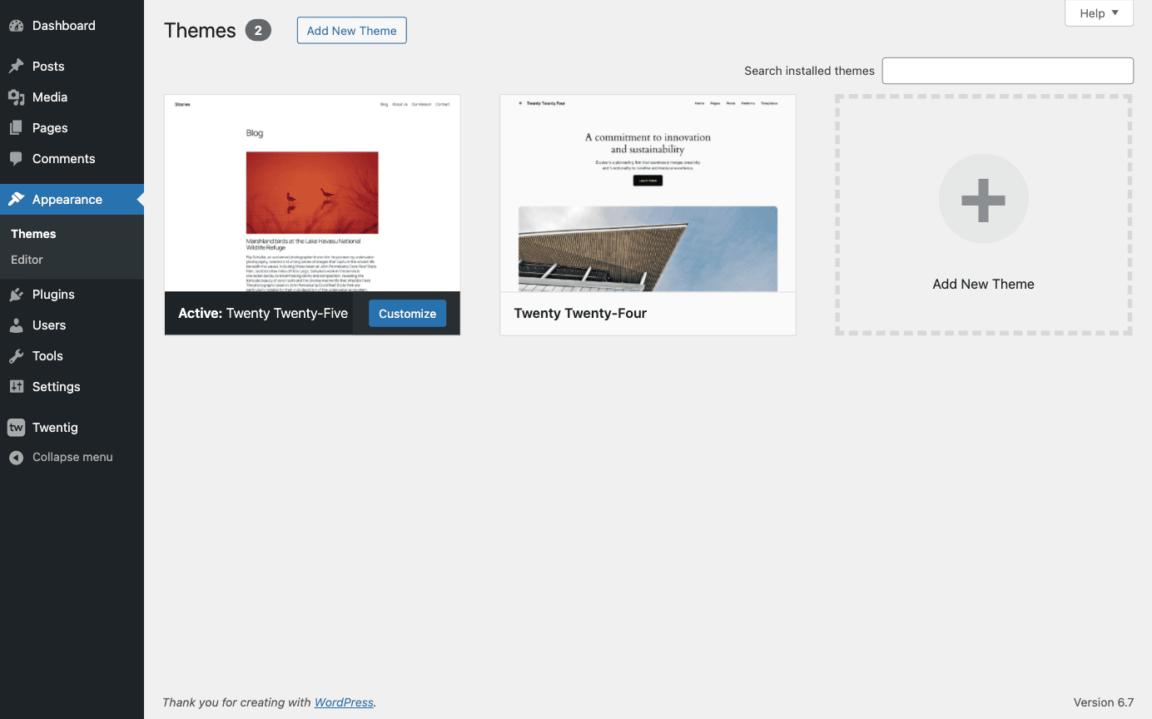
If you’re new to WordPress block themes and full site editing, the Beginner WordPress User course covers the basics to help you get started.
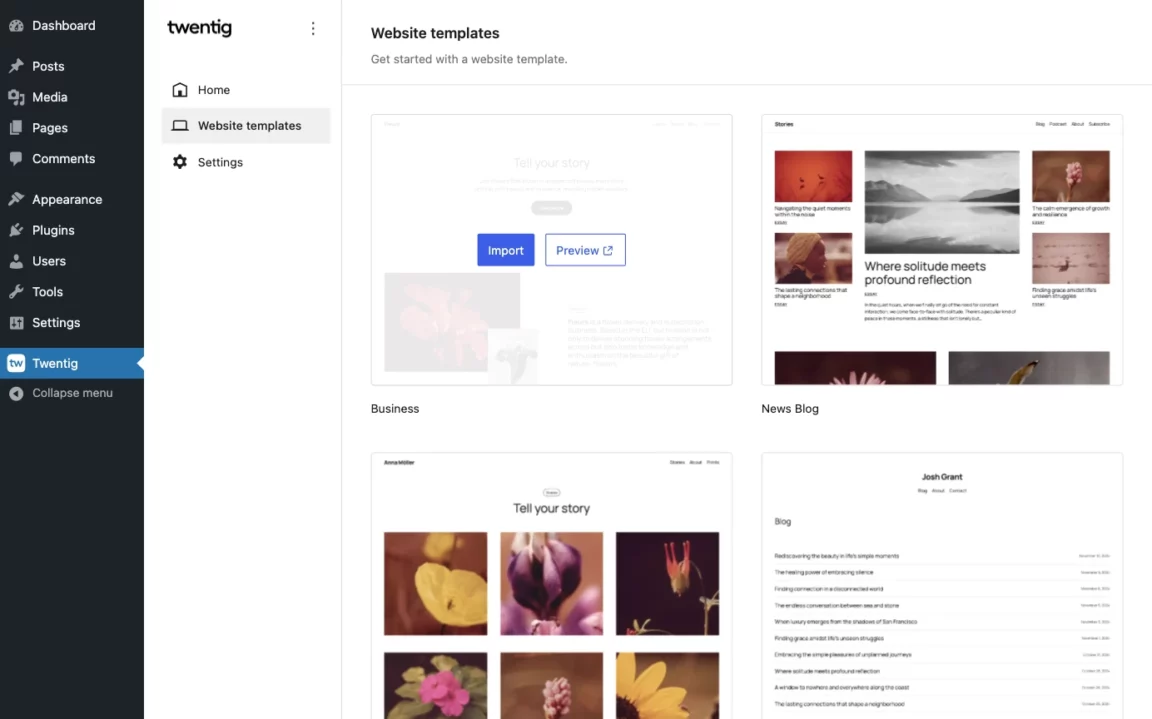
Import a starter site
Easily get started by importing a ready-made website. In your WordPress dashboard, go to Twentig > Website templates. Choose the starter website that best suits your needs and click the Import button.
Importing a starter site will create new pages, posts, navigations, and images while preserving your existing posts and pages. However, it will override your templates (index, archive, page, single post, etc.), template parts (header, footer), and styles (typography, colors, layout).
Build your site with blocks
Twentig enhances the existing WordPress blocks by offering additional styles, block settings (marked with a ![]() icon), and CSS classes. These options appear in the block settings sidebar when you select a block. To open the settings sidebar, click the
icon), and CSS classes. These options appear in the block settings sidebar when you select a block. To open the settings sidebar, click the ![]() icon.
icon.
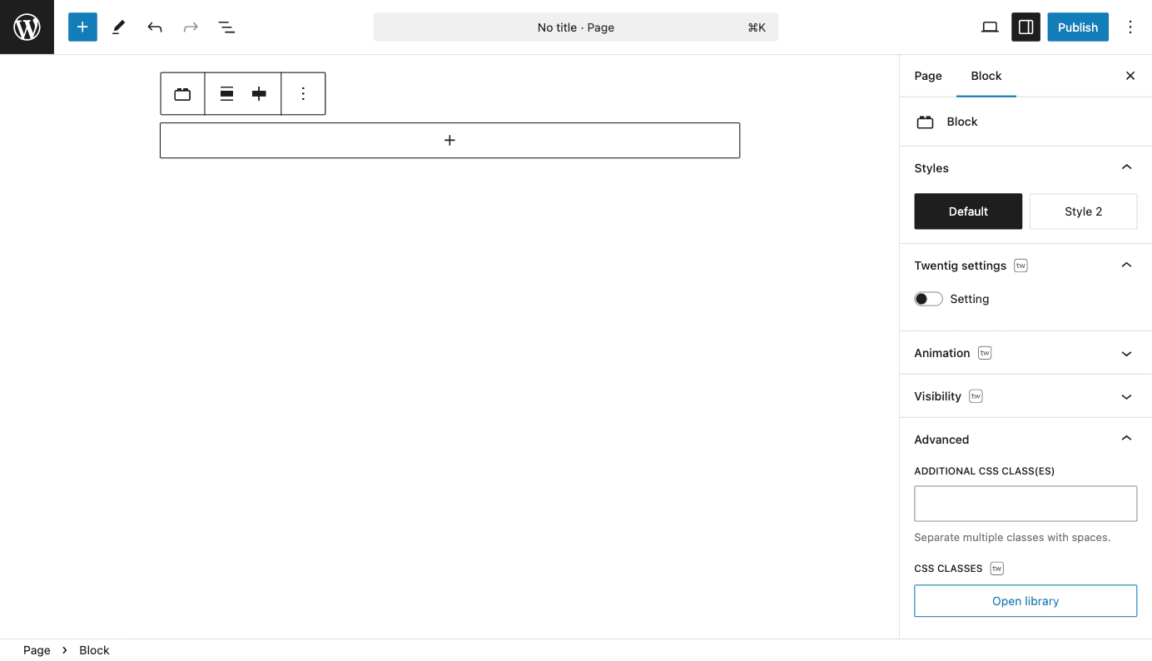
Customize blocks with additional settings
Twentig provides specific settings, styles, and CSS classes for the following blocks:
- Group: shape separator
- Columns: responsive layout
- Column: stretched link
- Media & Text: styles (shadow, overlap), responsive layout, reverse stack order, stretched link, full height
- Cover: shapes, stretched link, hover effect
- Heading: typography options, responsive alignment
- Paragraph: typography options, responsive alignment
- List: styles (dash, checkmark, arrow, border, no bullet, inline)
- Separator: styles (asterisks, dotted, dashed), width, height
- Image: shapes
- Gallery: fixed width columns, image aspect ratio, responsive layout, vertical alignment
- Social Icons: styles (square, rounded), hover effect
- Quote and Pullquote: styles (icon)
- Table: styles (border, inner border), vertical alignment
- Navigation: responsive breakpoint, menu icon size, hover style, active style
- Post Featured Image: shapes, hover effect
- Post Tags and Post Categories: styles (outline, pill, hashtag, plain), unlink option
- Post Author: inline layout, avatar shape
- Pagination: page numbers styles (square, circle, pill, plain), previous page and next page styles (square,pill)
- Previous Post and Next Post: styles (stack)
- Site Logo: image width on mobile
- Post Title: typography options, responsive alignment
- Tag Cloud: styles (rounded, pill, plain, list)
- Search: style (underline)
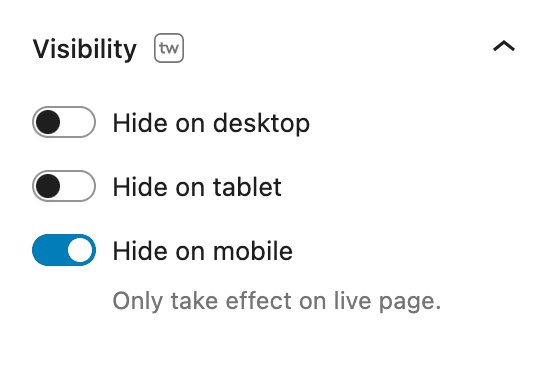
Control block visibility
In the Visibility panel, Twentig lets you control a block’s visibility based on the viewport size. When you enable a visibility option (Hide on Desktop, Hide on Tablet, or Hide on Mobile), the block will be hidden on this device.
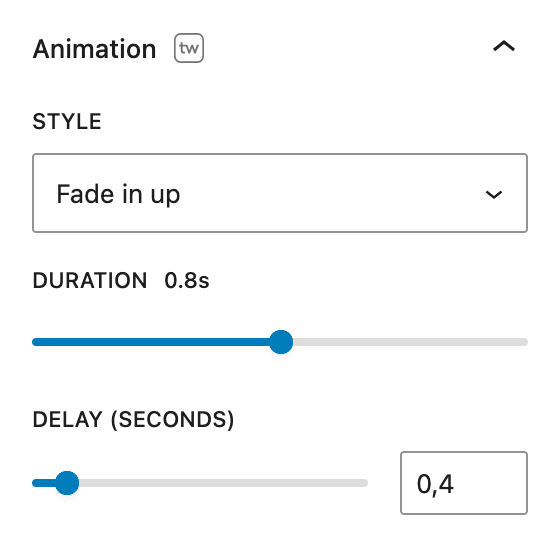
Animate blocks
Twentig lets you apply entrance effects to your blocks. In the Animation panel, you can select an animation style and adjust its speed and delay.
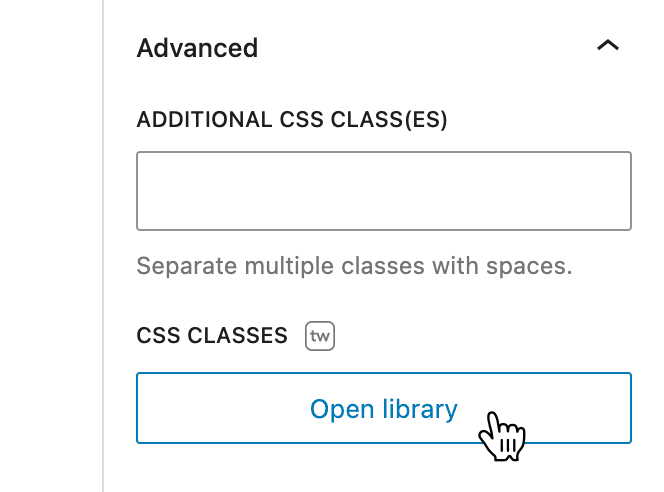
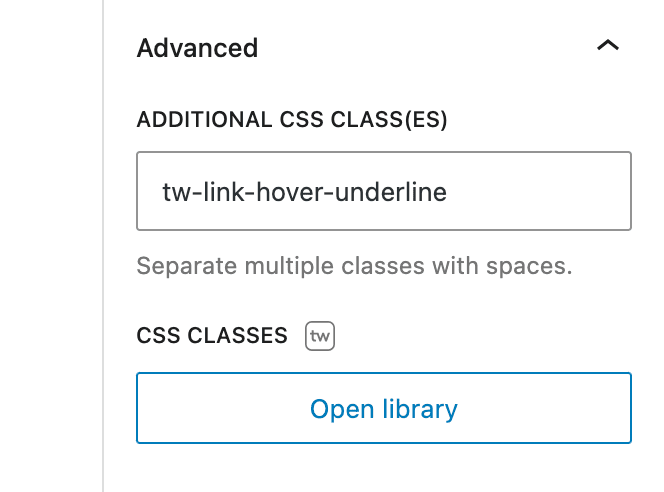
Add CSS Classes
To fine-tune your blocks, you can add CSS classes in the Advanced panel. Twentig provides a list of predefined CSS classes for various blocks.
To add predefined CSS classes, follow these steps:
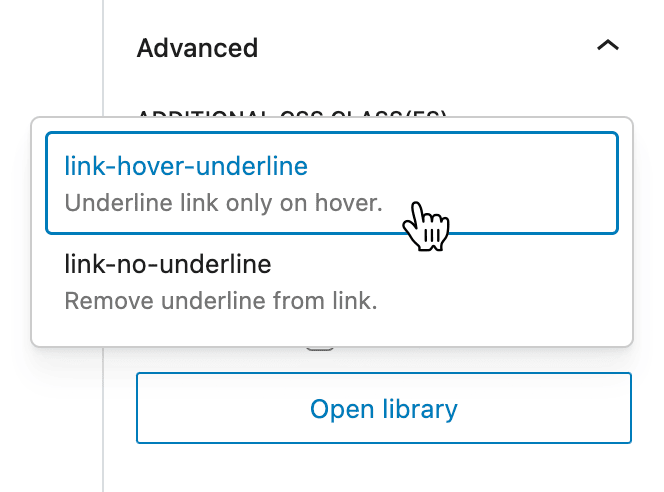
- Open the Advanced panel and click the Open library button.
- Select the class(es) you want to apply to the block.
- Click outside the popup to close the library. The selected classes are automatically added to the Additional CSS Class(es) field.
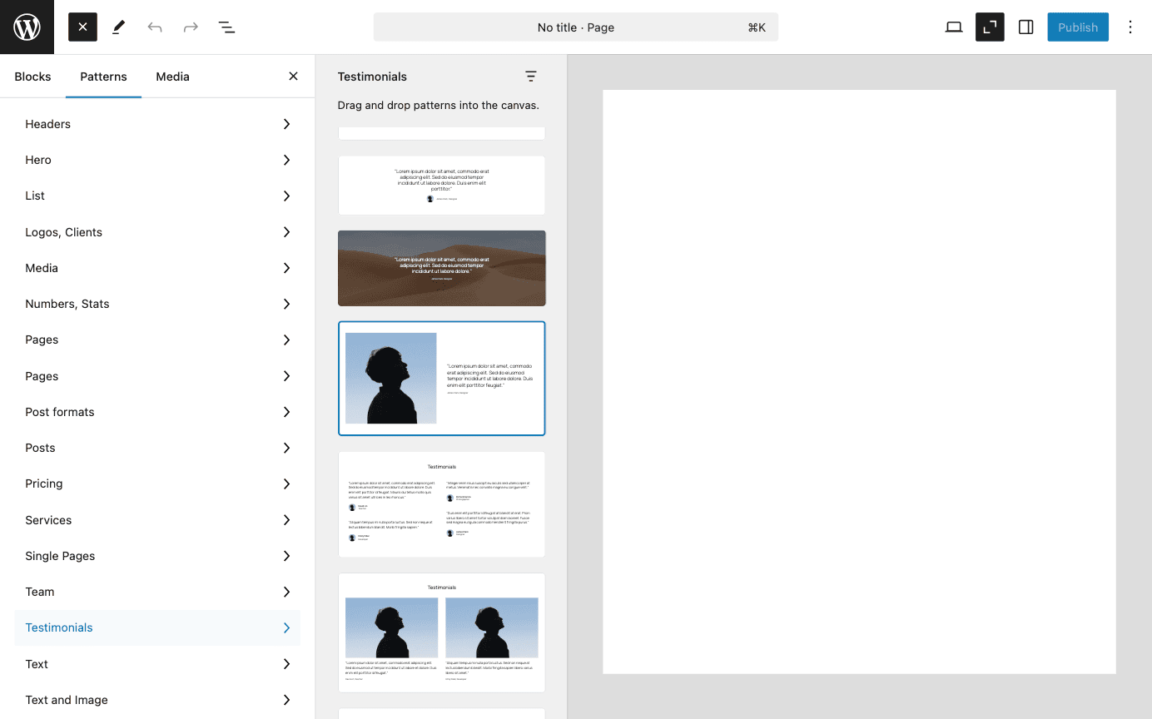
Build your site with patterns
Twentig brings hundreds of ready-to-use pre-designed patterns, making it easy to create stunning pages. There are different types of pre-designed patterns:
- Section patterns: Predefined arrangements of blocks that can be used standalone or combined with other block patterns. Categories include hero sections, team, testimonials, pricing, and more.
- Page patterns: Entire pre-designed pages available under the Pages category.
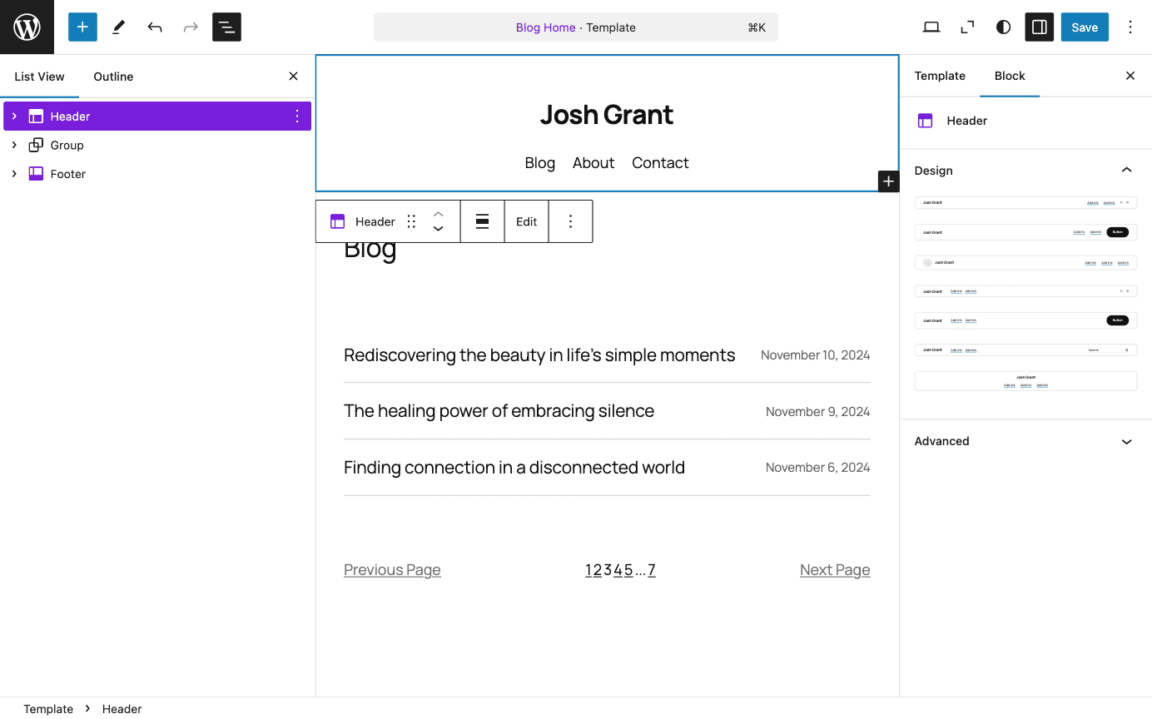
- Header and footer patterns: Patterns you can use to change the design of your theme’s Header and Footer template parts.
- Post patterns: Patterns you can insert to create or modify the design of the Query Loop block, which is used to display blog posts.
To insert a block pattern, follow these steps:
- In the block editor, place your cursor where you want to insert the block pattern.
- Click
 to open the block inserter.
 - Click the Patterns tab.
- Browse the categories and click the block pattern you want to insert (or drag and drop it into your content).
- Once inserted, you can edit the block pattern with your own content and customize it to fit your needs.
For header and footer patterns, you can choose them when the respective template part is selected:
- In Appearance > Editor, click the template part (Header or Footer) you want to change.
- In the Settings sidebar, under the Design section, select the pattern you want to use. This will replace the existing content.
Create a portfolio
Twentig provides the tools you need to easily create a portfolio website. Follow these steps to enable the portfolio features:
- In your WordPress dashboard, go to Twentig > Settings.
- Toggle on the Portfolio switch.
- Click the Save changes button.
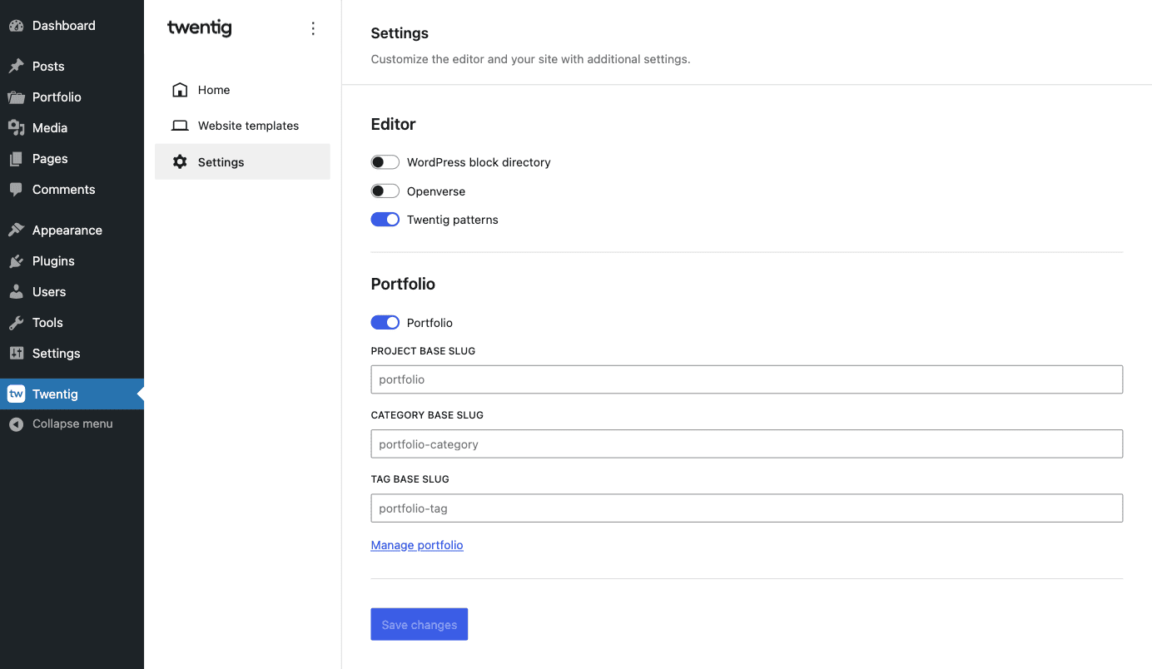
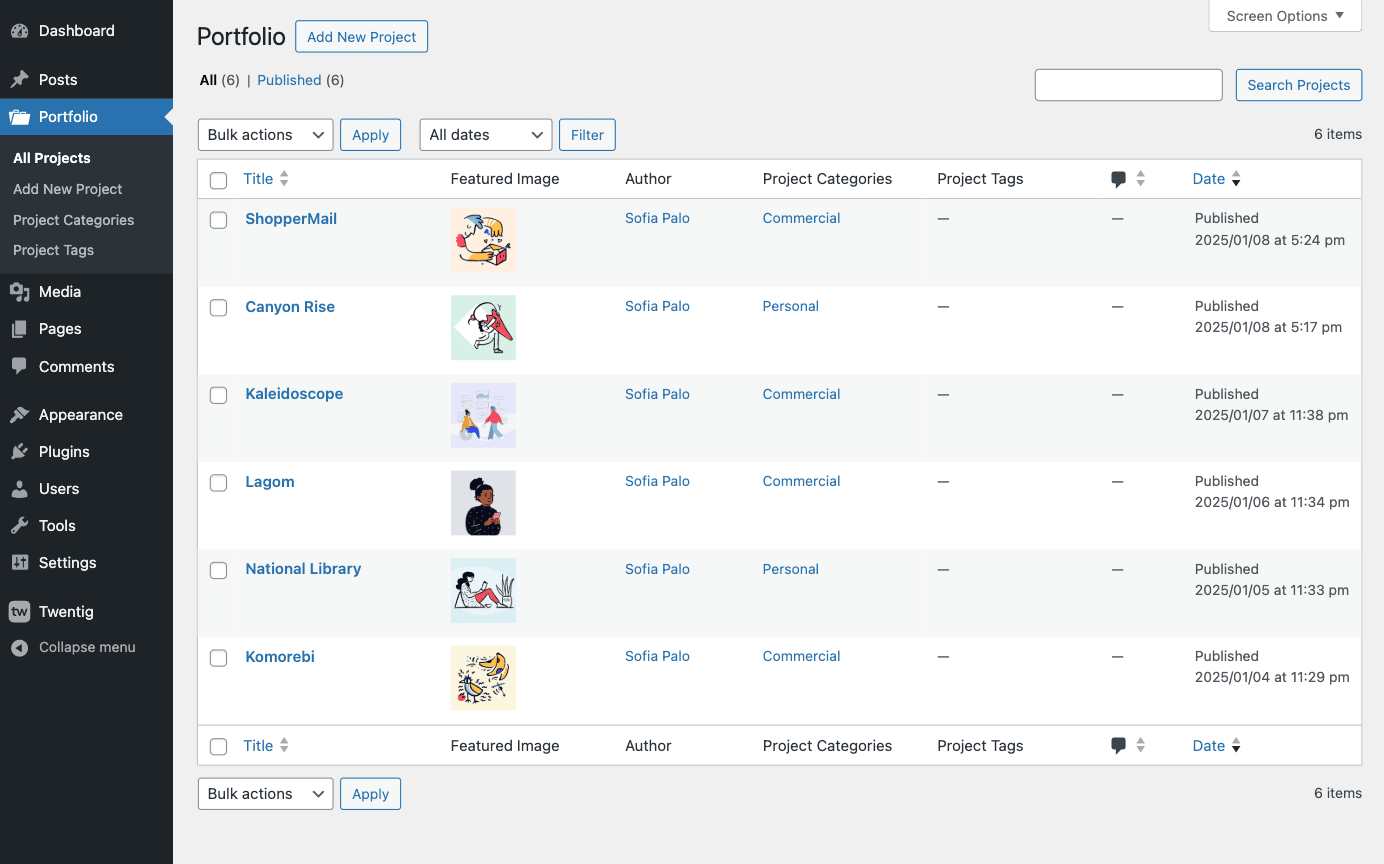
Click the Portfolio menu item that appears. Create your projects just as you would create posts.
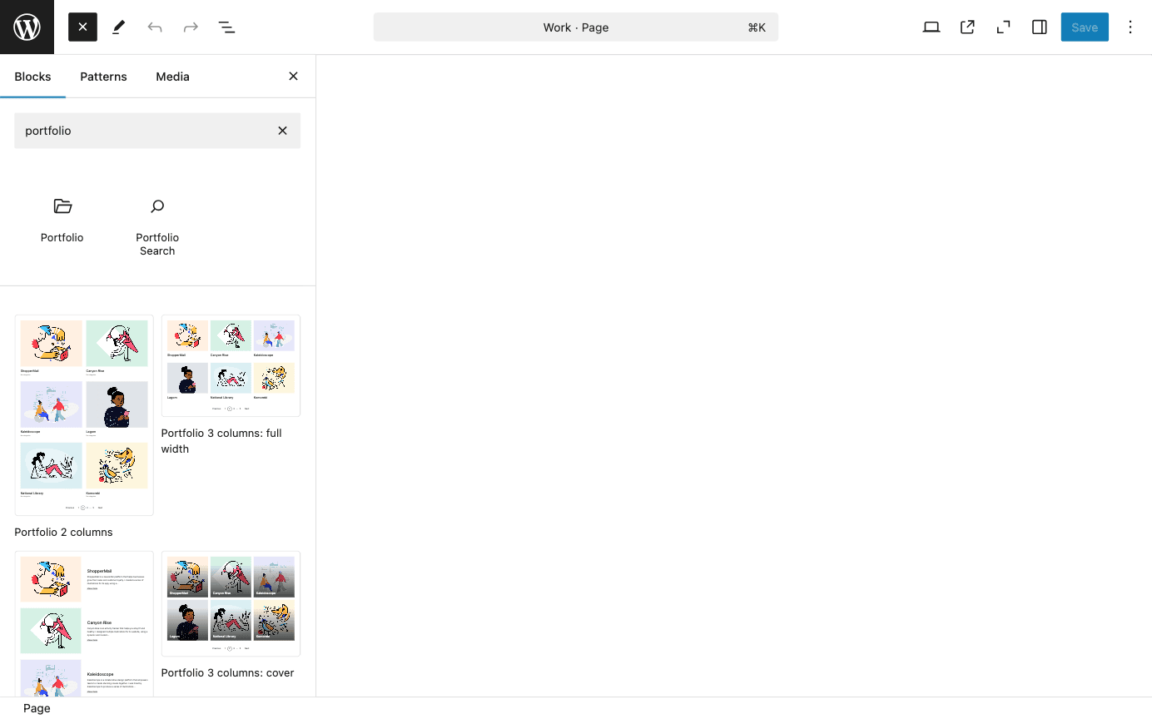
Once you’ve created your projects, follow these steps to display them on a page:
- Go to Pages > Add New Page.
- In the block inserter, type “portfolio” in the search bar.
- Insert the Portfolio block or choose one of the available patterns.

Congratulations
You’re ready to use Twentig like a pro! Subscribe to our newsletter to receive exclusive content, tips and updates.